Installing python locally#
Installing the miniforge python distribution#
In this course we have been relying on the JupyterHub server provided by the University of Washington to run our Jupyter notebooks. However, your JupyterHub account is tied to the course and will end some time after the course ended.
An alternative to using JupyterHub is to install python on your local machine. There are a few routes to do so, but we recommend the miniforge distribution. You can find and download the installer on https://conda-forge.org/download/
Once the installer is downloaded, follow the installation instruction and install the miniforge distribution. Once miniforge is installed, start a terminal (command prompt in Windows, Terminal in MacOS, etc.) with the base mamba environment activated (in Windows there is a separate icon for that, in Mac your Terminal should be configured to activate the base environment automatically). A mamba enabled terminal with the base environment activated should have a prompt that started with the text (base).
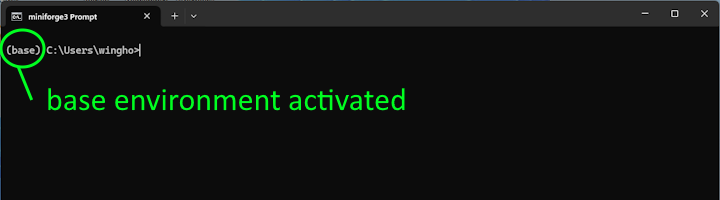
Figure: A mamba enabled terminal.
Installing third-party modules#
The base environment has a very limited number of third-party modules installed. So our next step is to install the third-party packages that you are now familiar with (numpy, scipy, pandas, xarray, matplotlib, etc.). While we can install these packages in the base environment, we recommend doing so in a new environment. In this appendix we’ll call this new environment “learn”, but you should feel free to change that name in the subsequent code.
The easiest way to create a new environment with the desired packages installed is to use a requirements.txt file. You can find an example of the requirements.txt file here.
Download the requirements.txt file to your local computer, then, change directory (via cd, using the same text-based file navigation convention we discussed in week 6) to the location of the requirements file, and execute the following command:
mamba create -n learn --file requirements.txt
(change the name learn to whatever way you want to name your environment)
Once the above command is entered, mamba should get to work and figure out what packages you need to install (some of the modules included in requirement.txt have prerequisites that are not listed, and mamba will take care of install those too). Confirm that the installation plan is correct, and mamba will create the environment and install the packages in it.
Once mamba is finished, follow the instruction it provides to activate the learn environment, namely:
mamba activate learn
When the learn environment is activated, the prompt of the terminal should start with the text (learn).
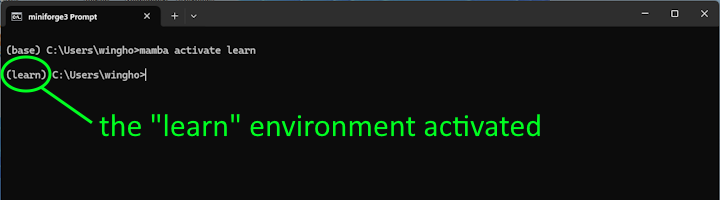
Figure: A terminal with the “learn” environment activated.
Finally, a number of packages installed on our JupyterHub are absent in the conda-forge repository that mamba uses but available in the pypi repository. To install these we have to use pip in the activated environment. The command is:
pip install -U -r pip-requirements.txt
Note that you need only to run the above installation procedure once. You do not have to set up your environment again in order to use it. Instead, follow the instructions in the subsection below to create and edit your jupyter notebooks.
Starting JupyterLab#
Instead of JupyterHub, in a local installation you will view your Jupyter notebooks using JupyterLab. To view your notebook in JupyterLab, first open a mamba-enabled terminal, then activate the learn environment (via mamba activate learn) and change directory (via cd) to the folder containing your notebook in the terminal. Next, in the same terminal, run:
jupyter lab
Your browser should automatically open with a JupyterLab page (which has similar interface as the JupyterHub page) that shows your notebook. You can now work on the notebook like you did with JupyterHub.